Necessity is often the mother of invention. When I first moved back from Columbus to Akron in late 2004, I quickly discovered a lack of good gnocchi in local restaurants and supermarkets. Now, that's not to say it didn't exist, but I didn't have the connections or knowledge to successfully seek it out. Having gotten hooked on the gnocchi served at Monte Carlo Italian Restaurant in Columbus during my five year stay, I knew that I couldn't subsist on the heavy, dense, sit-at-the-bottom-of-my-stomach variety that were available in the area. Thus, I decided to teach myself how to make it from scratch.
Homemade pasta scares a LOT of people. And to be honest, I think I was fairly intimidated by it as well. I had seen it made many times on television, and in theory, it looked simple enough. Depending on the type of pasta one was making, the basics were flour, eggs, sometimes oil, sometime water, and salt. One day, fed up with what was available and craving good gnocchi, I searched around the Internet for several recipes. Over the years, I have honed in on a single recipe that has served me well.
Gnocchi, at its most basic, is an Italian potato-based pasta. It isn't like pierogi, which are a pasta-like dough dough filled with potatoes (much like ravioli). Rather, the potato is actually in the dough itself, no filling necessary. Good gnocchi are ethereally light, almost pillow like. Bad gnocchi ... well, I've already described those to you, so I won't belabor the point. I suppose somehow along the way I've learned to channel a little old Italian grandmother inside of me when I am rolling out the dough, cutting the individual gnocchi and rolling them off the back of a fork to create the ribbed texture.
The recipe for gnocchi is almost stupid simple. In fact, let's get that out of the way right now.
Potato Gnocchi
2 pounds Idaho potatoes, peeled, boiled, and mashed
2 cups of All-Purpose flour, plus additional for kneading
1 egg
Salt and pepper to taste
You can really use any starchy potato for gnocchi, but I would avoid waxy potatoes, such as New or Fingerling, as they tend not to give you the creamy texture you are after. Also, I would stick with All-Purpose flour instead of stronger bread flour. You want the gnocchi to be ultra-tender and using bread flour could create a tougher pasta because of the higher protein content. For a single recipe, I generally don't measure the salt too closely, but if I were pressed to give a measurement, it would probably be a tablespoon of kosher (or coarse) salt. That may seem like a lot, but remember, you are making several pounds of pasta. To be fair, if I salt the dough, I tend not to salt the water in which I cook them.
The first step is to prepare the potatoes. For those really green in the kitchen, I will give a quick primer. First, peel the potatoes. Then cut the potatoes into thirds or quarters so that they cook more quickly. Just make sure to cut all of the potatoes into the same size pieces so that they cook evenly. Fill the pot with COLD water to cover the potatoes by at least an inch or two. Then place on stove and turn the burner on high until the water just starts to boil. Turn the stove down so that the potatoes cook in gently boiling water until a sharp knife easily goes in and comes out of the potato wedges. Drain the water in a colander, return the potatoes to the still hot pan and pull out your potato masher. Without adding anything additional (like milk and butter for regular mashed potatoes), mash away until they are smooth.
The great news is that you can do this step ahead of time (up to one day ahead). If you want to store them for later, place them in a container and place a piece of plastic wrap so that it touches the mashed potatoes before placing a lid on the container. This prevents the outer surface from drying out. Refrigerate until about thirty minutes before you need the potatoes. At that point, remove the container from the refrigerator and set it on the counter to take the chill off. Note that while you will start with two pounds of raw, unpeeled potatoes, after peeling, cooking, and mashing, you will end up with closer to a pound-and-a-half of finished potatoes.
To make the pasta, place the flour in a mound on your work surface. Using a fork, lightly scramble the egg in a small bowl. Using your finger, make a circular motion in the very center of the flour to create a well. Dump the egg into this well, along with the salt and the freshly ground pepper. Using the fork, slowly start to mix the flour from the edges of the well into the liquid egg, being careful not to break through the walls of the well. When enough flour gets mixed into the egg, it will thicken considerably and lose its "runniness." At this point, you can set the fork down and pick up the second most handy tool in the kitchen, the bench scraper. This tool is invaluable for making breads and pastas and at only a couple of dollars, is a multi-tasker that is an excellent investment.
The next step is to add the potatoes to the top of the flour/egg mound. I will tell you that at this point, you will be thinking to yourself, "What in the hell kind of a mess is this?" Trust me, it will all come together with a little love and time. Take the potato out of the container in chunks and run it through your fingers to break it up. If the mashed potatoes are freshly made (you did let them come down to room temperature, right?), you won't need to break them up. It will look like a LOT of potatoes compares to the amount of flour, but that is what makes the resulting gnocchi so tender.
Once the potatoes are on top of the flour, start using the bench scraper to lift and fold the mound onto itself over and over again, pressing down as you fold it over, compacting the dough. Every now and again, you can use the bench scraper to separate the dough from the work surface and simply rotate it or flip it over entirely. Continue doing this for a good five minutes or so, resisting the urge during this time to add more water or flour. The flour is being hydrated during this period and needs a few minutes of adjustment time before you can accurately tell how much adjustment it will need.
Once the dough is holding together (even if there are still visible areas of potato), switch to the best tool in the kitchen: your hands. Begin kneading the dough, using the bench scraper to separate the dough from the work surface as necessary. It is at this stage of the process that you will need to make the judgement call of adding either more flour or a little bit of water. The finished dough should be tacky, but not sticky. In the end, from start to end, it probably takes about ten minutes to make the pasta dough.
Once the dough looks and feels right, you will need to give it time for the gluten that has been activated in the flour to rest and relax. If you are going to roll out the gnocchi right away, mound the dough into a round and cover it with a damp towel or a piece of plastic and let it sit for at least twenty minutes. You could also put the dough into a covered container and refrigerate it overnight. Just make sure that if you refrigerate it, take it out about thirty minutes before you want to roll it to take the chill off the dough.
So, gentle reader, now we've made the dough. Let's take it one step further and make gnocchi.
Using your bench scraper, cut off a hunk of the dough, maybe about 1/2-3/4" thick. Have bench flour available for your work surface in case the dough is still a little sticky, but remember, the less flour used, the more tender the pasta will be, so it's always a balancing act. With the hunk of dough, use your fingertips to roll the dough into a long snake. The length of the snake will depend on how big your hunk of dough started at, but you generally want the cylinder (the snake) to be a thicker than a Tootsie Roll.
With your snake rolled out, use a small knife or the bench scraper (man that thing's gettin' a lot of use, no?) to begin moving from one end to the other cutting out the individual gnocchi, maybe 1/2-3/4" wide. You generally want the width to be less than the width of a fork. Once you've cut the entire snake, the final step is to give each pasta piece their characteristic ridges. Using the backside of a fork, take a single gnocchi and using the thumb of your non-fork-wielding hand, press and roll the dough against the fork. Do this for every dough piece that you cut.
Place the finished gnocchi on a parchment-lined 1/2 sheet pan (or cookie tray), making sure that the gnocchi don't touch each other. Now, simply cut another hunk of pasta dough from the mound and repeat the process until you've run out of dough. Typically, one batch of gnocchi dough will fill about 1 1/2 sheet pans (of the 1/2 sheet variety). If you are going to use the finished gnocchi immediately, now would be a good time to put a large pot of water on the stove to boil. Your other option is to freeze the gnocchi on the sheet pan. Once they are rock hard, scrape the gnocchi off the parchment and put them into a freezer bag. They'll keep in the freezer for quite some time, although they've never been in my freezer for more than a month.
Once the water has come to a boil, if you salted the dough, do not salt the water, too. If you didn't salt the dough, add a couple of tablespoons of kosher salt (or half as much table salt). Working quickly, add about half of the gnocchi to the pot of water and stir gently to make sure they aren't sticking to the bottom or each other. If you have previously frozen the gnocchi, add them straight from the freezer; do not defrost first. When the gnocchi start floating to the top of the pot, you know they are very close to being done. Fresh gnocchi will take just a few minutes to float and add another minute or two if you are boiling them from frozen.
One note about boiling the pasta. While it's okay to bring the water to a hard boil before adding the pasta, once the pasta is added and comes back to the boil, adjust the heat level so that it cooks the gnocchi on a gentle boil. Continued hard boiling of the pasta can cause it to break up. Also, make sure to gently stir the gnocchi while they are cooking.
Once the gnocchi is cooked, use a slotted spoon or a strainer to remove them from the boiling water. Depending on how you will be serving them, you can add them straight to a pan of sauce or you can place them into a bowl with just a touch (and I do mean just a touch) of oil to coat them so that they won't stick together. If you have additional gnocchi to cook, continue to do so in batches until they are all finished.
While I love gnocchi that have been finished in a bit of brown butter and sage, you could also do a simple tomato sauce, a spicier puttanesca sauce, or do what I did today at the market demonstration today, and finish the gnocchi in a saute pan with some freshly chopped garlic, pre-rendered bacon, and a tender green of some kind, like spinach, Swiss chard, or kale.
To a heated saute pan, add a bit of oil (I use grapeseed oil, but you could also use a neutral oil like Canola or light olive) and, if you remembered to keep it while cooking the bacon, some of the rendered bacon fat. When the oil is hot, add about a tablespoon of chopped garlic and cook for a minute or so until you smell the garlic and it gets just a hint of color to it. Add your gnocchi to the saute pan and stir (or flip the contents if you know how) to coat the gnocchi in the garlic and oil. In addition to adding flavor to the gnocchi, sauteeing it for a few minutes allows you to add some crispy outer texture to it as well.
If you prefer a little bit of spice to your dish, add just a smidgeon of crushed red pepper to the pan. Not so much that it makes the dish spicy, but just enough so that it gives character to the finished dish. Next, add some of the crumbled bacon. Stir/toss to combine. Finally, add a large handful of fresh greens, and about 1/4 cup of the pasta cooking water to the pan. Quickly cover the pan with the lid and allow the greens to steam for about forty-five seconds. Remove the lid and toss the pasta one final time before tasting it to make sure it has enough salt and pepper. Adjust accordingly.
To serve, either plate on a family-style platter or in individual servings in a bowl. Sprinkle freshly grated Parmesan or Romano cheese on top and serve. This recipe would probably make 8-10 servings as an appetizer, or 4-5 servings as the pasta course.
While I will be the first to admit that making homemade gnocchi can be a time-consuming task, because you can break it down into bite-sized pieces (please pardon the expression), you can make it when you have time and freeze it and when you are ready to serve it for dinner, you need to do no more work than walk to your freezer and retrieve it. At the Howe Meadow Farmers Market where I made this exact dish yesterday for market goers, I made two batches of dough (though to be fair, I made the mashed potatoes the night before) and cooked it in three batches for tasters in roughly two hours. That included mixing the dough, rolling it, cutting it, cooking it and serving it.
And, in one of the best compliments I received all day during my demo, when I told a woman who had approached my tent what I was making, she looked apprehensive and said that while she has tried gnocchi many times, none had ever come close to her Italian Nonna. She watched as I finished the boiled gnocchi in the saute pan and spooned a portion into the small paper cup that the market had provided for me. I handed it to her and watched her expression as she tasted one and then a second of the small hot potato dumplings.
"In all the years I've been eating gnocchi, none has ever lived up to my Nonna's until now. Yours is as good as hers."
High praise, indeed! I hope you give this recipe a try for yourself. Once you learn the basics, it is quite easy to do and the results are really worth it. Even cooked from frozen, this gnocchi blows away anything you could purchase in a local supermarket.

Showing posts with label recipe. Show all posts
Showing posts with label recipe. Show all posts
Sunday, July 31, 2011


Monday, September 27, 2010
Kitchen Challenge: Panzanella Salad At Hudson Farmers Market
After my last adventure doing a demonstration at the Howe Meadow Farmers Market at the end of August, I thought my demonstration days for the year were pretty much over. When I was unexpectedly contacted about two weeks ago by Catherine St. John, owner and teacher at the Western Reserve School of Cookery in Hudson, I was surprised to learn that a spot had opened up at the Hudson Farmers Market for a recipe demonstration. Apparently, the person who had backed out had planned on showcasing the breads from Great Lakes Baking Company and was going to prepare a panzanella salad. Catherine told me I could do the same thing or simply pick a new recipe as long as it highlighted the breads.
I thought about it over the weekend and decided that I didn't want to get into anything nearly as complicated as I did for my previous demonstration. I did some research on panzanella salads on the Internet and pretty much came to the conclusion that other than day old bread and fresh tomatoes, panzanella salad was pretty much an open book. Dressed with a fresh vinaigrette, this was a salad designed at its very core to use ingredients both leftover and fresh. I agreed to do the demonstration and on the morning of Saturday, September 25th, I showed up about an hour earlier than necessary to set up my station, gather the necessary bowl, cutting board and metal spoon from the cooking school, and make my rounds to the various vendors, gathering the few simple ingredients I would need today to make my salad.
So let's talk about the primary players in today's demonstration. First up were two day-old baguettes that I managed to secure from Great Lakes Baking Company:

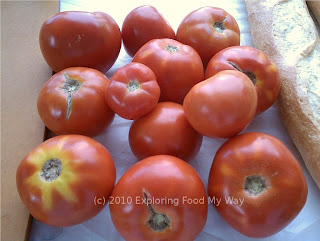
From one of the Amish vendors, I bought three pints of very red and very ripe tomatoes:
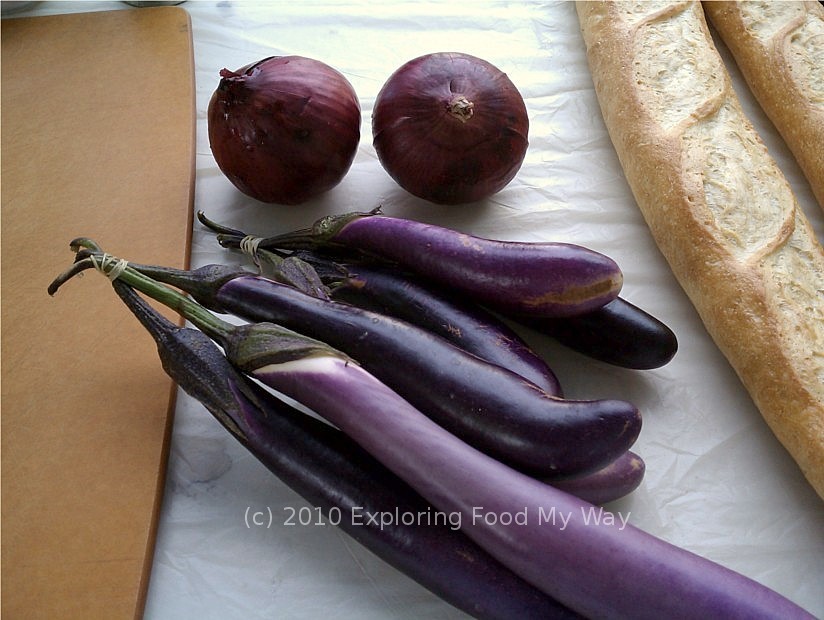
Between this vendor and another one, I also managed to add some red onions and Asian eggplants to the mix:

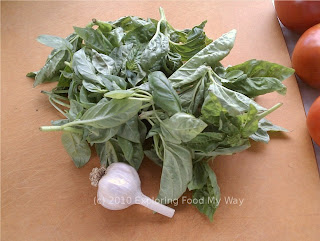
The final fresh components came from one of the vendors offering fresh organic basil and garlic:
To prepare the salad, first I used my paring knife to core all of the tomatoes. I then switched to my chef's knife and did a rough dice of all the tomatoes. Since panzanella is a rustic salad, there was no need for a fine dice on any of the ingredients. After cutting all of my tomatoes and adding them to my mixing bowl, I turned my attention to the two medium-sized red onions. After peeling each, I cut them both into a rough dice as well, discarding the root ends. My general rule of thumb in vegetable preparation today was to try and cut all of the vegetables to the same size.
Since the Asian eggplant was long and slender (you could also use regular eggplant, too), I cut them into "coins" and then cut the larger coins in half where necessary. The Asian eggplant had a bit of a slight bitterness to it that I hoped would match well to the sweetness from the ripe tomatoes and the acidity from the vinaigrette. If there was one surprising item that I learned from today's demonstration, it was the fact that so many people didn't realize that you can eat eggplant raw. I can't count the number of times I heard, "Wait, you added raw eggplant?"
The small bulb of garlic I had purchased during my earlier shopping spree yielded about five good-sized cloves that I smacked with the side of my knife to release the paper husk. I then sliced the individual cloves thinly before adding them to my mixing bowl. For the final "fresh" ingredient, the basil, I picked the tender leaves from the stems, piled them up on my cutting board and used my knife to slice them into thin ribbons. Had the amount of leaves I needed been much smaller, I would have stacked the leaves, rolled them up and done a proper chiffonade on them. Since I had a limited amount of time before serving today's market-goers, I did a simpler, more rustic cut. I added the fresh basil to the mixing bowl and turned to the other star of the show: the bread.
Switching to my trusty serrated bread knife, I began thinly cutting the baguettes, probably about 1/8" thick. After slicing through one and a half baguettes, I stacked four or five of the slices on top of each other and cut the entire stack in half so that they were a similar size to the already cut up vegetables. I have also seen versions of this salad where the bread was torn from the loaf, sort of free form. I think either way will work just fine. I added all of the sliced and cut bread to the mixing bowl and began the final step of assembling the salad, building the red wine vinaigrette.
Here were the ingredients I used today to build my red wine vinaigrette:

The wonderful thing about vinaigrettes is that at its most basic you need oil, vinegar, Dijon mustard, salt and pepper ... that's it! And even the mustard is optional in a real basic vinaigrette. The Dijon mustard actually plays two roles in this particular vinaigrette. First, I love the bit of heat that the prepared mustard adds to the finished dressing. Second, mustard seeds contain a natural substance called lecithen which actually acts to emulsify the dressing so that the oil and vinegar don't separate after mixing.
To the small mason jar in the above photograph, I added two healthy spoonfuls of mustard, three nice pinches of kosher salt, several grinds of freshly cracked black peppercorns and enough red wine vinegar to go about one third of the way up the jar. I then added enough extra virgin olive oil until it was about three-quarters full. I placed the lid on the jar and screwed the cap down firmly, shook vigorously and tasted. I wanted a dressing that was tart, but not overly so. From this point it is all about adjusting the flavor to your taste. If it is too oily, add more vinegar; too tart, add more oil. It took about two or three adjustments of adding oil and salt before I got it to the perfect level.
I added the entire contents of the jar to my mixing bowl along with a nice pinch of sea salt and more freshly cracked black pepper, grabbed the large metal spoon and began to gently toss the salad, scooping from the bottom of the bowl and lifting to the top. I wanted to make sure that I was gentle so that I didn't break the ripe tomatoes down too much as I mixed. How did I know when the salad was ready? Basically, once the bread absorbed the vinaigrette and the juice that had come out of the tomatoes, it softened up a bit. At that point, I tasted it for seasoning, made some corrections, and ended up with this:

At this point I looked up and realized that quite the crowd had gathered round the demonstration booth. I knew that we needed to get the samples out as quickly as possible. Using the cardboard containers that the market's manager, J Hudson, had supplied, he and I quickly did an assembly line style plating and handed the dishes out to eager patrons:
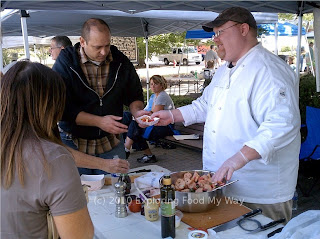
What had taken me about forty-five minutes to prepare took only twenty minutes to plate and serve. Honestly, given the size of the salad I had made, I was a little surprised it went so quickly. Once the bowl was completely empty, I fielded any remaining questions from the crowd and began to clean up and break down my station. I'm not exactly sure how many samples we handed out today at the market, but if I had to guess, it was probably somewhere between 40 and 50. Of course, you are certainly free to scale the amounts I used today up or down to feed the number of hungry mouths you have on hand.
Sadly, we are nearing the end of the picking season for this year. That being said, you still have a couple more weeks to get to the Hudson Farmers Market (or whatever market is closest to you) if you want to try out this salad. The tomatoes really do need to be at their peak of ripeness, so if you wait too long, it won't be until next summer before you have another shot at making this tasty and fresh salad.
[Ed. note: A quick thank you to Chef Brian from Hudson's Restaurant on the Green for helping me to expedite some of the samples handed out today.]
I thought about it over the weekend and decided that I didn't want to get into anything nearly as complicated as I did for my previous demonstration. I did some research on panzanella salads on the Internet and pretty much came to the conclusion that other than day old bread and fresh tomatoes, panzanella salad was pretty much an open book. Dressed with a fresh vinaigrette, this was a salad designed at its very core to use ingredients both leftover and fresh. I agreed to do the demonstration and on the morning of Saturday, September 25th, I showed up about an hour earlier than necessary to set up my station, gather the necessary bowl, cutting board and metal spoon from the cooking school, and make my rounds to the various vendors, gathering the few simple ingredients I would need today to make my salad.
So let's talk about the primary players in today's demonstration. First up were two day-old baguettes that I managed to secure from Great Lakes Baking Company:

From one of the Amish vendors, I bought three pints of very red and very ripe tomatoes:

Between this vendor and another one, I also managed to add some red onions and Asian eggplants to the mix:
The final fresh components came from one of the vendors offering fresh organic basil and garlic:

To prepare the salad, first I used my paring knife to core all of the tomatoes. I then switched to my chef's knife and did a rough dice of all the tomatoes. Since panzanella is a rustic salad, there was no need for a fine dice on any of the ingredients. After cutting all of my tomatoes and adding them to my mixing bowl, I turned my attention to the two medium-sized red onions. After peeling each, I cut them both into a rough dice as well, discarding the root ends. My general rule of thumb in vegetable preparation today was to try and cut all of the vegetables to the same size.
Since the Asian eggplant was long and slender (you could also use regular eggplant, too), I cut them into "coins" and then cut the larger coins in half where necessary. The Asian eggplant had a bit of a slight bitterness to it that I hoped would match well to the sweetness from the ripe tomatoes and the acidity from the vinaigrette. If there was one surprising item that I learned from today's demonstration, it was the fact that so many people didn't realize that you can eat eggplant raw. I can't count the number of times I heard, "Wait, you added raw eggplant?"
The small bulb of garlic I had purchased during my earlier shopping spree yielded about five good-sized cloves that I smacked with the side of my knife to release the paper husk. I then sliced the individual cloves thinly before adding them to my mixing bowl. For the final "fresh" ingredient, the basil, I picked the tender leaves from the stems, piled them up on my cutting board and used my knife to slice them into thin ribbons. Had the amount of leaves I needed been much smaller, I would have stacked the leaves, rolled them up and done a proper chiffonade on them. Since I had a limited amount of time before serving today's market-goers, I did a simpler, more rustic cut. I added the fresh basil to the mixing bowl and turned to the other star of the show: the bread.
Switching to my trusty serrated bread knife, I began thinly cutting the baguettes, probably about 1/8" thick. After slicing through one and a half baguettes, I stacked four or five of the slices on top of each other and cut the entire stack in half so that they were a similar size to the already cut up vegetables. I have also seen versions of this salad where the bread was torn from the loaf, sort of free form. I think either way will work just fine. I added all of the sliced and cut bread to the mixing bowl and began the final step of assembling the salad, building the red wine vinaigrette.
Here were the ingredients I used today to build my red wine vinaigrette:

The wonderful thing about vinaigrettes is that at its most basic you need oil, vinegar, Dijon mustard, salt and pepper ... that's it! And even the mustard is optional in a real basic vinaigrette. The Dijon mustard actually plays two roles in this particular vinaigrette. First, I love the bit of heat that the prepared mustard adds to the finished dressing. Second, mustard seeds contain a natural substance called lecithen which actually acts to emulsify the dressing so that the oil and vinegar don't separate after mixing.
To the small mason jar in the above photograph, I added two healthy spoonfuls of mustard, three nice pinches of kosher salt, several grinds of freshly cracked black peppercorns and enough red wine vinegar to go about one third of the way up the jar. I then added enough extra virgin olive oil until it was about three-quarters full. I placed the lid on the jar and screwed the cap down firmly, shook vigorously and tasted. I wanted a dressing that was tart, but not overly so. From this point it is all about adjusting the flavor to your taste. If it is too oily, add more vinegar; too tart, add more oil. It took about two or three adjustments of adding oil and salt before I got it to the perfect level.
I added the entire contents of the jar to my mixing bowl along with a nice pinch of sea salt and more freshly cracked black pepper, grabbed the large metal spoon and began to gently toss the salad, scooping from the bottom of the bowl and lifting to the top. I wanted to make sure that I was gentle so that I didn't break the ripe tomatoes down too much as I mixed. How did I know when the salad was ready? Basically, once the bread absorbed the vinaigrette and the juice that had come out of the tomatoes, it softened up a bit. At that point, I tasted it for seasoning, made some corrections, and ended up with this:

At this point I looked up and realized that quite the crowd had gathered round the demonstration booth. I knew that we needed to get the samples out as quickly as possible. Using the cardboard containers that the market's manager, J Hudson, had supplied, he and I quickly did an assembly line style plating and handed the dishes out to eager patrons:

What had taken me about forty-five minutes to prepare took only twenty minutes to plate and serve. Honestly, given the size of the salad I had made, I was a little surprised it went so quickly. Once the bowl was completely empty, I fielded any remaining questions from the crowd and began to clean up and break down my station. I'm not exactly sure how many samples we handed out today at the market, but if I had to guess, it was probably somewhere between 40 and 50. Of course, you are certainly free to scale the amounts I used today up or down to feed the number of hungry mouths you have on hand.
Sadly, we are nearing the end of the picking season for this year. That being said, you still have a couple more weeks to get to the Hudson Farmers Market (or whatever market is closest to you) if you want to try out this salad. The tomatoes really do need to be at their peak of ripeness, so if you wait too long, it won't be until next summer before you have another shot at making this tasty and fresh salad.
[Ed. note: A quick thank you to Chef Brian from Hudson's Restaurant on the Green for helping me to expedite some of the samples handed out today.]
Monday, August 3, 2009
eG Heartland Gathering: Focaccia is Fantastic
My main contribution to the Heartland Gathering for the past three years has been bread. The first two years it was fairly easy to do bread because the gathering was in Ann Arbor and Cleveland. This made it very easy to start the breads on Friday night after work and bake into early Saturday morning. A couple hours of sleep and I was off to the main event. Last year in Chicago proved to be a much more interesting challenge because not only was Chicago a six hour drive, but I was also arriving earlier in the week for a couple pre-Gathering events. Fortunately, there was enough interest (and at the last minute an available kitchen) for me to put together a bread workshop where we actually made the breads for the dinner the next day.
This year's Heartland Gathering was in Kansas City. And I drove. And arrived at midnight on Saturday morning. Hmmm ... how was that going to work? Well, gentle reader, I'm here to tell you.
I stayed with a good friend and founder of eGullet, Fat Guy (his screen name). When I was teetering on the fence on whether to attend this year's festivities, he offered to share his room with me. This was enough of a financial incentive for me to commit to the Saturday and Sunday activities. Knowing that I wouldn't have access to an oven until 2 pm on Saturday, I decided that I would do all of the steps of making my focaccia bread at the hotel and then transport the almost finished doughs to the venue for this year's dinner.
Fortunately, Fat Guy was able to secure a room on the first floor as lugging around my KitchenAid Pro up and down the stairs was not something I really wanted to do.
Once I finally arrived, I started the pre-ferment, in this case a poolish, for the three batches of focaccia I would be making. The poolish adds a wonderful sour element (but not nearly as sour as a sourdough) to the finished breads and a nice depth of flavor. Plus, the poolish helps to extend the shelf-life of the finished bread, although to be fair, I don't think it was around too long once the noshing started.
To make a poolish, you need:
* 250 grams of bread flour
* 250 grams of room temperature water
* 2 grams of active dry yeast (basically 1/3 of a packet)
I would recommend using bottled water since the chlorine gas has had a chance to escape. And remember that since there are only a few ingredients, they must all be really good. If your tap water tastes bad, it won't do much to help your bread either.
Once you have all of your ingredients in your container (this can rise significantly, so use a big enough container), mix vigorously with a wooden spoon until it has the consistency of thick pancake batter. Cover this with a lid (or plastic) and sit it in a draft free corner for anywhere from 6-12 hours. If you find that you can't use it right away, it can be successfully stored in the refrigerator for up to two days.


After about 8-12 hours of sitting in a nice draft-free corner, if done correctly, your poolish should look something like this:


Notice all of the little bubbles and tiny holes. When you first remove the cover, take a deep breath. This is the smell of a good starter. Virtually any bread you make with this will benefit from the time you took to make the pre-ferment.
Now that your poolish is ready, you are ready to make your focaccia dough. At this point you need to break out the serious tools, especially your KitchenAid stand mixer. Here is a shot of mine sitting on the dresser next to the TV set (which I moved to accommodate the mixer):

Here is a shot of the basic ingredients required for the main dough:

Into the KitchenAid bowl, add:
* 430 grams of bread flour
* 100 grams of cornmeal
* 7 grams of active dry yeast (1 packet)

You can now add the extra virgin olive oil and all of the poolish to the bowl:
* 500 grams poolish
* 15 grams of extra virgin olive oil (also known as 1 tablespoon)

Before starting to build the recipe, you should measure your salt and water separately so that you can add them at the appropriate time:
* 296 grams of room temperature water
* 16 grams of salt (preferably sea salt)

The thing to remember about the water is that IT is the variable in the recipe, not the flour. 296 grams of water is a starting point, you might need less, you might need more. It all depends on the humidity of the day, the protein level of your flour and the age of the flour. I always find that it's better to add 50 less grams of water initially than what is called for in the recipe and slowly add the last 50 grams until the dough gets to the right consistency. Even then, I may have to add more water, but I do it very slowly. In today's dough, I actually used about 284 grams of water instead of 296 grams. An over-hydrated dough can turn sticky and unmanageable very quickly.
Also make sure that you don't let the salt touch the yeast directly or it may actually kill it. Using the dough hook, start the mixer slowly (setting "1") to mix the ingredients. Once the ingredients have come together, increase the speed of the mixer to "2" and knead the dough for 6-7 minutes. The gluten in the dough is properly formed when it can pass the windowpane test.

Notice that even though we have a rather wet dough, it is not sticking to the sides of the bowl. This is a good thing. Once the dough is fully kneaded, transfer to a slightly oiled container,

cover with a lid (or plastic), and put into a draft-free corner for about 60-90 minutes or until the dough has visibly doubled in size. The amount of time will really depend on how warm your spot is. In this particular instance, I let it rise about 2 hours before folding it over. Remove the lid, fold the dough over onto itself to release the gas buildup as well as redistribute the yeast and re-cover and place back in the corner. The second rise shouldn't take nearly as long as the first since the yeast is now nice and active, maybe about half to three-quarters the amount of time as the first rise.

Once the dough has risen a second time, it is ready to be panned. First, turn on your oven to 375 degrees Fahrenheit in order to allow it to sufficiently pre-heat. Now, take a sturdy half-sheet pan and spray the bottom with release spray (i.e. Pam). Then cut a piece of parchment to the size of your pan and lay it in the bottom of the pan.

The Pam will initially help to hold the parchment paper in place and after baking will help to release the finished bread from the pan. Once the parchment is in place, use a brush to spread a thin layer of olive oil on top of the parchment. The oil will not only help to flavor and slightly crisp the bottom of the focaccia, but will also help in removing the parchment from the bottom of the bread.

Now that the pans are ready, use a flexible plastic scraper to transfer the fully fermented dough into the middle of the pan.

Wet your hands or spray your hands with release spray and gently begin pushing the dough to fill the pan.
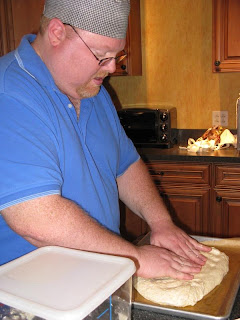
This will take about three or four times to accomplish because the tendency of the dough will be to spring back. Every five minutes, push the dough a little further out towards the edge of the pan, making sure to cover the top of the pan with a tea towel between attempts to avoid drying out the dough.

While you are stretching your dough, you can create the flavorful topping. In this case we will need:
* 3/4 cup extra virgin olive oil
* 11-12 cloves of garlic, finely chopped
* 1/2 cup fresh rosemary, finely chopped
This amount will actually make enough topping for two half-sheets of focaccia, so if you are making a different amount of bread, you can adjust it accordingly.

Once the dough has been stretched, give it about ten minutes to rise a little more. Using a spoon, spread an appropriate amount of the topping onto the focaccia. Then, use your finger tips to gently dimple the top of the dough, pressing the toppings downward.

Allow this to proof for ten more minutes. Before going into the oven, sprinkle the top of the dough with some nice coarse Kosher salt.

Place this into the center of the oven and bake for 25-30 minutes, or until the bread is nicely browned and the garlic is nicely caramelized. You may need to rotate the pan half-way through the baking process. Once the pan is removed from the oven, immediately remove the bread from the pan and place onto a cooling rack. Once on the rack, you should be able to easily remove the parchment paper from underneath the bread. After it has completely cooled (which takes about 45-60 minutes), cut up into appropriately-sized portions. A half-sheet should make 24 portions if cut into 2" x 2" squares. However, you can get man more portions if you cut it into a different shape.
The topping can really be anything you find flavorful. In fact, if you wanted to pair the focaccia with something else like cheese, you could just finish the top off simply with Kosher salt and cracked black peppercorns. That's what I decided to do for a second variety of focaccia that I knew would be served during the cheese pre-dinner course.

You'll see how we ended up using (and eating) both versions (rosemary & garlic and salt & pepper) in the next two entries where I will cover both the Heartland Dinner pre-dinner and the dinner itself. Let's just say that both breads turned out spectacularly and I was quite pleased with the results.
[Ed. note: The photos taken of me working in the kitchen (I'm in the blue shirt) were photographed by another attendee, jgm, who has graciously surrendered the copyright of her photos to me and I am hereby re-releasing them under the Creative Commons license that governs this blog. Documentation is on file to confirm this.]
This year's Heartland Gathering was in Kansas City. And I drove. And arrived at midnight on Saturday morning. Hmmm ... how was that going to work? Well, gentle reader, I'm here to tell you.
I stayed with a good friend and founder of eGullet, Fat Guy (his screen name). When I was teetering on the fence on whether to attend this year's festivities, he offered to share his room with me. This was enough of a financial incentive for me to commit to the Saturday and Sunday activities. Knowing that I wouldn't have access to an oven until 2 pm on Saturday, I decided that I would do all of the steps of making my focaccia bread at the hotel and then transport the almost finished doughs to the venue for this year's dinner.
Fortunately, Fat Guy was able to secure a room on the first floor as lugging around my KitchenAid Pro up and down the stairs was not something I really wanted to do.
Once I finally arrived, I started the pre-ferment, in this case a poolish, for the three batches of focaccia I would be making. The poolish adds a wonderful sour element (but not nearly as sour as a sourdough) to the finished breads and a nice depth of flavor. Plus, the poolish helps to extend the shelf-life of the finished bread, although to be fair, I don't think it was around too long once the noshing started.
To make a poolish, you need:
* 250 grams of bread flour
* 250 grams of room temperature water
* 2 grams of active dry yeast (basically 1/3 of a packet)
I would recommend using bottled water since the chlorine gas has had a chance to escape. And remember that since there are only a few ingredients, they must all be really good. If your tap water tastes bad, it won't do much to help your bread either.
Once you have all of your ingredients in your container (this can rise significantly, so use a big enough container), mix vigorously with a wooden spoon until it has the consistency of thick pancake batter. Cover this with a lid (or plastic) and sit it in a draft free corner for anywhere from 6-12 hours. If you find that you can't use it right away, it can be successfully stored in the refrigerator for up to two days.


After about 8-12 hours of sitting in a nice draft-free corner, if done correctly, your poolish should look something like this:


Notice all of the little bubbles and tiny holes. When you first remove the cover, take a deep breath. This is the smell of a good starter. Virtually any bread you make with this will benefit from the time you took to make the pre-ferment.
Now that your poolish is ready, you are ready to make your focaccia dough. At this point you need to break out the serious tools, especially your KitchenAid stand mixer. Here is a shot of mine sitting on the dresser next to the TV set (which I moved to accommodate the mixer):

Here is a shot of the basic ingredients required for the main dough:

Into the KitchenAid bowl, add:
* 430 grams of bread flour
* 100 grams of cornmeal
* 7 grams of active dry yeast (1 packet)

You can now add the extra virgin olive oil and all of the poolish to the bowl:
* 500 grams poolish
* 15 grams of extra virgin olive oil (also known as 1 tablespoon)

Before starting to build the recipe, you should measure your salt and water separately so that you can add them at the appropriate time:
* 296 grams of room temperature water
* 16 grams of salt (preferably sea salt)

The thing to remember about the water is that IT is the variable in the recipe, not the flour. 296 grams of water is a starting point, you might need less, you might need more. It all depends on the humidity of the day, the protein level of your flour and the age of the flour. I always find that it's better to add 50 less grams of water initially than what is called for in the recipe and slowly add the last 50 grams until the dough gets to the right consistency. Even then, I may have to add more water, but I do it very slowly. In today's dough, I actually used about 284 grams of water instead of 296 grams. An over-hydrated dough can turn sticky and unmanageable very quickly.
Also make sure that you don't let the salt touch the yeast directly or it may actually kill it. Using the dough hook, start the mixer slowly (setting "1") to mix the ingredients. Once the ingredients have come together, increase the speed of the mixer to "2" and knead the dough for 6-7 minutes. The gluten in the dough is properly formed when it can pass the windowpane test.

Notice that even though we have a rather wet dough, it is not sticking to the sides of the bowl. This is a good thing. Once the dough is fully kneaded, transfer to a slightly oiled container,

cover with a lid (or plastic), and put into a draft-free corner for about 60-90 minutes or until the dough has visibly doubled in size. The amount of time will really depend on how warm your spot is. In this particular instance, I let it rise about 2 hours before folding it over. Remove the lid, fold the dough over onto itself to release the gas buildup as well as redistribute the yeast and re-cover and place back in the corner. The second rise shouldn't take nearly as long as the first since the yeast is now nice and active, maybe about half to three-quarters the amount of time as the first rise.

Once the dough has risen a second time, it is ready to be panned. First, turn on your oven to 375 degrees Fahrenheit in order to allow it to sufficiently pre-heat. Now, take a sturdy half-sheet pan and spray the bottom with release spray (i.e. Pam). Then cut a piece of parchment to the size of your pan and lay it in the bottom of the pan.

The Pam will initially help to hold the parchment paper in place and after baking will help to release the finished bread from the pan. Once the parchment is in place, use a brush to spread a thin layer of olive oil on top of the parchment. The oil will not only help to flavor and slightly crisp the bottom of the focaccia, but will also help in removing the parchment from the bottom of the bread.

Now that the pans are ready, use a flexible plastic scraper to transfer the fully fermented dough into the middle of the pan.

Wet your hands or spray your hands with release spray and gently begin pushing the dough to fill the pan.

This will take about three or four times to accomplish because the tendency of the dough will be to spring back. Every five minutes, push the dough a little further out towards the edge of the pan, making sure to cover the top of the pan with a tea towel between attempts to avoid drying out the dough.

While you are stretching your dough, you can create the flavorful topping. In this case we will need:
* 3/4 cup extra virgin olive oil
* 11-12 cloves of garlic, finely chopped
* 1/2 cup fresh rosemary, finely chopped
This amount will actually make enough topping for two half-sheets of focaccia, so if you are making a different amount of bread, you can adjust it accordingly.

Once the dough has been stretched, give it about ten minutes to rise a little more. Using a spoon, spread an appropriate amount of the topping onto the focaccia. Then, use your finger tips to gently dimple the top of the dough, pressing the toppings downward.

Allow this to proof for ten more minutes. Before going into the oven, sprinkle the top of the dough with some nice coarse Kosher salt.

Place this into the center of the oven and bake for 25-30 minutes, or until the bread is nicely browned and the garlic is nicely caramelized. You may need to rotate the pan half-way through the baking process. Once the pan is removed from the oven, immediately remove the bread from the pan and place onto a cooling rack. Once on the rack, you should be able to easily remove the parchment paper from underneath the bread. After it has completely cooled (which takes about 45-60 minutes), cut up into appropriately-sized portions. A half-sheet should make 24 portions if cut into 2" x 2" squares. However, you can get man more portions if you cut it into a different shape.
The topping can really be anything you find flavorful. In fact, if you wanted to pair the focaccia with something else like cheese, you could just finish the top off simply with Kosher salt and cracked black peppercorns. That's what I decided to do for a second variety of focaccia that I knew would be served during the cheese pre-dinner course.

You'll see how we ended up using (and eating) both versions (rosemary & garlic and salt & pepper) in the next two entries where I will cover both the Heartland Dinner pre-dinner and the dinner itself. Let's just say that both breads turned out spectacularly and I was quite pleased with the results.
[Ed. note: The photos taken of me working in the kitchen (I'm in the blue shirt) were photographed by another attendee, jgm, who has graciously surrendered the copyright of her photos to me and I am hereby re-releasing them under the Creative Commons license that governs this blog. Documentation is on file to confirm this.]
Tuesday, May 12, 2009
A Proven Winner: Drunken Fruit Salad
I was invited to dinner by a good college friend of mine and decided to bring something dessert-ish since she would be cooking everything else. A couple of years ago, faced with having to prepare an "adult" fruit salad for an event I was catering, I came up with a recipe that has wowed party guest after party guest. And I've decided to share that with you today.
The great thing is that it is SO simple. First up, start with the freshest, ripest fruit that you can get your hands on. Cut it into bite-sized pieces. It can be any fruit you like and is in season. Honestly, I can't think of a single fruit that wouldn't work well. I usually try and get between three and four different fruits, and try to vary colors and flavors. Today I had wonderfully ripe strawberries, pineapple, mangoes (I actually found a few that were nice and ripe), and blood oranges. I cut them up and placed them in a bowl:

Then come the secret ingredients that take a simple bowl of cut up fruit to fruit nirvana. You want to add some type of sweetness, the heavenly scent of vanilla, and an orange brandy:

Let's talk left to right. Agave Nectar is a recent addition to most regular grocery stores. You can definitely find it at places like Mustard Seed Market or Heinen's, but I've also managed to find it at Acme and Buehler's as well. If there is an organics section in your grocery store, it's most likely located there. Otherwise, I'd check wherever the honey is located. It comes in both an amber and light variety. The amber has a more assertive flavor which is nice, but for today's recipe I went with light. Not because light has fewer calories (it doesn't), but because it adds less of its own flavor than amber would. You could also do honey or a simple syrup if you wanted. Heck you could even just do plain sugar in a pinch.
Next up is the vanilla. Don't use imitation vanilla. Don't use vanilla bean extract. Go the extra mile and get yourself a fresh vanilla bean. You and your guests will be thankful you did. Yes, it's a bit more expensive, but after you've finished up using the vanilla pod, you can rinse it off and insert it into some sugar to create wonderfully aromatic vanilla sugar for future baking projects. To use the vanilla bean, take a sharp paring knife and split the bean lengthwise. Using the blade of the knife, scrape all the seeds out of the bean and place on top of your fruit. The seeds are kind of sticky and syrupy so you may need to scrape the knife off with your finger. After you've cleaned out both halves of the bean, cut the split bean in half so that it is half the length it was originally and place the beans inside the bowl of fruit. Using the outer skin of the bean will lend an additional level of vanilla flavor as it macerates in the refrigerator.
Finally, the orange brandy. Feel free to use a premium version such as Grand Marnier or Cointreau, but realize that some of the less expensive brands (such as Harlequin) work just as well at half the price. Follow the same rule that you'd use when cooking with wine: if you'd drink it in a glass, you should feel good about using it in recipes.
The amount of sweetener and orange brandy you add is completely up to you. The amount of sweetener will depend on how sweet the fruit is naturally. The orange brandy is there as a counterpoint to the vanilla. Personally, I add enough brandy to the fruit until I can just taste the alcohol harshness of the brandy. For today's batch, I probably added about 1/2 cup. Also add just a pinch of kosher or sea salt. With the "juiciness" of the salad, it should dissolve without any problem. Now, I know it seems odd to add salt to something sweet, but the salt actually accentuates the sweet flavor and brings it to the forefront. Think of what happens when you mix M&M's and popcorn at the movie theater. By themselves, good, but together, yum!
After stirring gently with a large spoon, you get this:

Now the most important part; while you could eat this immediately, it is best served after sitting in the fridge for a minimum of four hours. This allows all the flavors to marry, the brandy to mellow out, and most importantly the formation of the wonderful fruit "liqueur". The sugar from the sweetener acts in a hygroscopic fashion to pull moisture out of the fruit. This mixes with the brandy and the vanilla to form a juice that can be enjoyed even after the fruit salad is gone. People were actually doing shots of this liqueur at the last party I attended where I brought this dish.
I typically put this mixture in a sealed container and give it a good mixing every couple of hours by turning the container end over end to redistribute all the wonderful juices. Like I mentioned before, give it a minimum of four hours to macerate, but you could definitely do it the night before as well. After 24 hours or so, the fruit will begin to break down considerably, so you might want to consider other options such as using it in a smoothie or a fruit compote to serve over a dessert.
If you want to make a kid-friendly version of the above, just leave out the liquor. It won't be quite as good, but the vanilla and agave syrup alone will make a lovely fruit salad that all can enjoy.
The great thing is that it is SO simple. First up, start with the freshest, ripest fruit that you can get your hands on. Cut it into bite-sized pieces. It can be any fruit you like and is in season. Honestly, I can't think of a single fruit that wouldn't work well. I usually try and get between three and four different fruits, and try to vary colors and flavors. Today I had wonderfully ripe strawberries, pineapple, mangoes (I actually found a few that were nice and ripe), and blood oranges. I cut them up and placed them in a bowl:

Then come the secret ingredients that take a simple bowl of cut up fruit to fruit nirvana. You want to add some type of sweetness, the heavenly scent of vanilla, and an orange brandy:

Let's talk left to right. Agave Nectar is a recent addition to most regular grocery stores. You can definitely find it at places like Mustard Seed Market or Heinen's, but I've also managed to find it at Acme and Buehler's as well. If there is an organics section in your grocery store, it's most likely located there. Otherwise, I'd check wherever the honey is located. It comes in both an amber and light variety. The amber has a more assertive flavor which is nice, but for today's recipe I went with light. Not because light has fewer calories (it doesn't), but because it adds less of its own flavor than amber would. You could also do honey or a simple syrup if you wanted. Heck you could even just do plain sugar in a pinch.
Next up is the vanilla. Don't use imitation vanilla. Don't use vanilla bean extract. Go the extra mile and get yourself a fresh vanilla bean. You and your guests will be thankful you did. Yes, it's a bit more expensive, but after you've finished up using the vanilla pod, you can rinse it off and insert it into some sugar to create wonderfully aromatic vanilla sugar for future baking projects. To use the vanilla bean, take a sharp paring knife and split the bean lengthwise. Using the blade of the knife, scrape all the seeds out of the bean and place on top of your fruit. The seeds are kind of sticky and syrupy so you may need to scrape the knife off with your finger. After you've cleaned out both halves of the bean, cut the split bean in half so that it is half the length it was originally and place the beans inside the bowl of fruit. Using the outer skin of the bean will lend an additional level of vanilla flavor as it macerates in the refrigerator.
Finally, the orange brandy. Feel free to use a premium version such as Grand Marnier or Cointreau, but realize that some of the less expensive brands (such as Harlequin) work just as well at half the price. Follow the same rule that you'd use when cooking with wine: if you'd drink it in a glass, you should feel good about using it in recipes.
The amount of sweetener and orange brandy you add is completely up to you. The amount of sweetener will depend on how sweet the fruit is naturally. The orange brandy is there as a counterpoint to the vanilla. Personally, I add enough brandy to the fruit until I can just taste the alcohol harshness of the brandy. For today's batch, I probably added about 1/2 cup. Also add just a pinch of kosher or sea salt. With the "juiciness" of the salad, it should dissolve without any problem. Now, I know it seems odd to add salt to something sweet, but the salt actually accentuates the sweet flavor and brings it to the forefront. Think of what happens when you mix M&M's and popcorn at the movie theater. By themselves, good, but together, yum!
After stirring gently with a large spoon, you get this:

Now the most important part; while you could eat this immediately, it is best served after sitting in the fridge for a minimum of four hours. This allows all the flavors to marry, the brandy to mellow out, and most importantly the formation of the wonderful fruit "liqueur". The sugar from the sweetener acts in a hygroscopic fashion to pull moisture out of the fruit. This mixes with the brandy and the vanilla to form a juice that can be enjoyed even after the fruit salad is gone. People were actually doing shots of this liqueur at the last party I attended where I brought this dish.
I typically put this mixture in a sealed container and give it a good mixing every couple of hours by turning the container end over end to redistribute all the wonderful juices. Like I mentioned before, give it a minimum of four hours to macerate, but you could definitely do it the night before as well. After 24 hours or so, the fruit will begin to break down considerably, so you might want to consider other options such as using it in a smoothie or a fruit compote to serve over a dessert.
If you want to make a kid-friendly version of the above, just leave out the liquor. It won't be quite as good, but the vanilla and agave syrup alone will make a lovely fruit salad that all can enjoy.
Subscribe to:
Posts (Atom)
