
Like most Thanksgiving celebrations, our hostess would be providing the turkey and some of the side dishes. Each guest was encouraged to bring whatever they thought would make the meal complete. After bringing that wonderful French bread and brioche to the Julie and Julia party, I knew I wouldn't be able to get away without bringing some type of bread. I decided to go with a bread that I first learned about from friend and teacher Kathy Lehr (I know, I know, gentle reader, a THIRD Kathy in this story). Kathy is the bread instructor at the Western Reserve School of Cooking in Hudson, Ohio. I took several of Kathy's single-day bread classes before committing to the week long professional class she does twice a year in the summer.
Before Kathy's class, I would say that I had a good understanding of the science of bread. What Kathy taught me was the zen-like interaction one must have in order to roll with the punches. Because bread is a living organism, you can't simply rely on the written recipe to get perfect bread time after time. To get that perfect loaf of bread you have to touch the dough, smell the dough and look at the dough. It was under her tutelage that I finally realized that I could stop worrying so much about all the facts and still get great bread.
One of the recipes that she taught us in her week-long class was her recipe for Roasted Red Pepper and Black Peppercorn bread. Although I have changed the metrics to favor weight rather than volume, the recipe is the same one that she provided me years ago. She has graciously allowed me to reprint it here on the blog so that I can share it with all of you. Catherine St. John, owner of the Western Reserve School of Cooking, also felt that this would be an excellent bread for the holidays and encouraged me to contact Kathy so that I might have all the approvals I needed in order to reprint her recipe here on the blog.
The first step is to get 2 large or 3 medium sized red peppers:

Make sure that the skin is nice and tight (wrinkles = oldness). You want to cut the tops off of the peppers, remove any of the white ribs and seeds, and fill each pepper up with two tablespoons of extra virgin olive oil:

Now using your hands, roll the peppers around so that the oil completely coats the inside of the pepper. Pour the remaining oil out onto your hands and completely coat the outside as well. Place the now coated peppers in either a pie plate or a Pyrex baking dish and place into a pre-heated 350 degree Fahrenheit oven. After 30 minutes, pull the dish out and add a little more olive oil to each pepper, turning the peppers to coat in the additional olive oil. At this point they will have begun to start to wilt. If the peppers have started to blister on the bottom, rotate them so that an unblistered side is now on the bottom. Roast for another 30 minutes.
Pull the pepper out of the oven and place in a small glass or plastic bowl just large enough to hold the peppers. Cover tight with plastic wrap:

The residual heat from the peppers will be trapped underneath the plastic wrap and will help to steam the skins loose from the flesh. After about 10-15 minutes, remove the plastic wrap and using your fingers and a sharp pairing knife, skin each pepper. Don't worry if the pepper flesh rips or falls apart; we'll be dicing the peppers up in the end anyway. DON'T throw away any extra oil or pepper juice. You'll need it for the bread recipe. Once the peppers are peeled, return them to the bowl with the now lovely smelling roasted red pepper olive oil you just made, cover them with plastic and store them in the fridge overnight. Fortunately, this step can be done several days in advance.
To make the dough, we first need to get our mise en place ready. Here are the roasted red peppers, the olive oil, and the black peppercorns:

You'll need to finely dice the roasted red peppers and place in one dish. Try and strain as much of the oil from the peppers as you can. In a second dish, we'll need 56 grams (or 4 tablespoons) of the roasted red pepper olive oil. If you don't have enough, make up the difference in extra virgin olive oil. For the black peppercorns, you'll need 8 grams of whole black peppercorns (or 1 1/2 tablespoons already cracked peppercorns). When I first started making this recipe, I used to actually spend 20 minutes freshly cracking all the pepper required. Since I bought a mortar and pestle, I find it much easier to simply weigh out 8 grams, place it in the mortar and voila! In about five minutes I have nicely ground and very aromatic pepper.
I placed the ground peppercorn, along with 20 grams of fine sea salt (not Kosher) and 3 grams (or 1 tablespoon) of dried basil on a plate:

You could use fresh basil in place of dried, but basil is one of the few dried herbs that really works well, so I always just opt for the convenience of it.
Finally, in the KitchenAid mixing bowl I have placed 700 grams of bread flour, 300 grams of whole wheat flour, and 7 grams of instant yeast (which would be 9 grams of actively dried yeast or 20 grams of fresh cake yeast). Also, to the right of the bowl is 450 grams of room temperature water:

The original recipe actually called for 500 grams of water; however, the unknown in this recipe is the amount of water in the red peppers. It's always easier to add more water if you need it.
The first step is to attach the bowl to the stand mixer, insert the dough hook, and begin combining the flours and yeast on the lowest speed:

After the flours and yeast are mixed, add the black pepper, the dried basil, all of the olive oil and three-quarters of the water you have already measured out. Continue to mix on the lowest speed until you see the water absorbed by the flour:

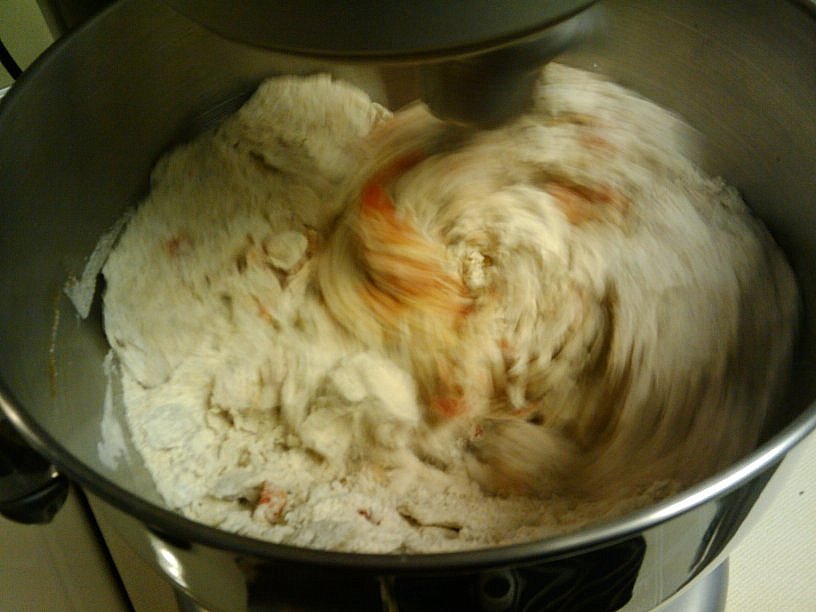
At this point, add all of the roasted red peppers and continue to mix on lowest speed:
Now you should only be left with two remaining ingredients, water and salt. I ended up adding all 450 grams of water in my batch and then just a little bit more. The trick is that you want the dough to be fully hydrated, but not so much that it becomes a sticky mess. After adding all 450 grams of water, the bottom of my mixing bowl looked like this:

See just the bit of dry flour at the bottom? To an inexperienced bread maker, this is the point where you'd start to freak out and add too much water. It was at this point I turned the mixer onto the second lowest setting (which would be '2' on my KitchenAid) and added probably about another 15-20 grams of additional water, very slowly. Within a minute, the dough became properly hydrated. How could I tell? Stop the machine and touch the dough. Is it tacky and not sticky? Perfect! Using the mixer, knead the dough for between 4-5 minutes on speed 2. At this point slowly add the salt in a stream and knead for another minute.
The dough should clean the sides of the bowl, the salt should be thoroughly incorporated, and the surface of the dough will be moist without sticking to either the bowl or you:

Using either your hands or a flexible plastic bowl scraper, shape the dough into a nice round ball, place in the bottom of your bowl (or other appropriate vessel), cover with either a lid or plastic wrap, cover with a tea towel and set it someplace warm (I usually set in on the top of my refrigerator as warm air rises). Depending on the warmth of your room, the first rise can take anywhere from 1 to 2 hours. Today mine took 1 hour 30 minutes. At this point you want to use the flexible bowl scraper to go around the bowl and literally pull the edges into the center. This will not only deflate the dough, but also help to redistribute the yeast and the sugars available for the yeast to feed on. Recover with plastic and the towel and place it back into the warm spot.
The second rise normally takes just slightly over half the time of the original rise. I decided to let mine go for 1 hour. At that point, I used my plastic scraper to gently scrape the dough out of the bowl and onto a floured work surface. Use only as much flour as required; at this point, less flour is better. Use a metal bench scraper (or a sharp knife) to divide the dough into three equal portions. A kitchen scale works very well to make sure you have three even loaves. At this point, you could decide to make whatever shape you wanted for the bread. Today I choose boules. After shaping the boules, I placed them seam-side up on a floured side towel:

As soon as you get your boules shaped and covered, turn your oven on to 450 degrees Fahrenheit. Place your pizza stone or inverted half-sheet pan in the center of the oven with a right-side-up sheet pan (anything with a lip) on the rack on the bottom of the oven. Once the boules are fully proofed, flip them seam-side down onto a bread peel and slide them onto the stone/pan (two in each back corner and one in the middle front). Throw 1/4 cup water into the pan at the bottom of the oven being careful not to spill it. Close the oven door and bake for 10 minutes. After 10 minutes, turn the oven down to 350 degrees and bake for another 20 minutes. You want the internal temperature of each loaf to reach 195-200 degrees Fahrenheit when read with an instant read thermometer.
At this point, use the peel to remove the loaves from the oven and place on a cooling rack:

Let them cool COMPLETELY! I know it's tempting to cut into them when they are still warm, but there is still much chemically going on inside the loaves as they cool. Cut into them too soon and the interior texture will be gummy and unappetizing.
During Friendsgiving, we enjoyed the bread two ways. First, I cut up and served some bread slices for the appetizer table. Paired with a little fresh Brie or some olive oil or hummos, this was a wonderful way to enjoy the bread. Second, I prepared two bread baskets that sat at either end of the table:

Spread with just a little bit of softened butter, the sweet from the roasted red peppers and the spiciness from the freshly cracked black peppercorns plays so well on the palate. Even if you don't spread anything on the bread, it has a fantastic flavor profile all on its own. The nice thing about this bread is that it can also be made ahead of time, by weeks or months, and frozen. To freeze, wrap each completely cooled loaf (cool at least three-four hours) in a double layer of plastic wrap and place each loaf into a freezer-safe bag. To use, simple take the still wrapped loaves out of the freezer and place onto the counter until completely thawed. You can re-crisp the loaves (or simply warm them up) by placing them in a 350 degree oven for 5-10 minutes before slicing. I would not try and thaw them in the microwave. When I thaw, I usually take them out of the freezer the morning I need them and they are usually fine for dinner the same day.
Even if you decide not to give this delicious bread a try for your upcoming Thanksgiving holiday, I urge you to take the time and give this recipe a try sometime soon. You won't be sorry you did.
Here's a tear sheet of the ingredients you'll need:
Roasted Red Pepper and Black Peppercorn Bread
700 grams Bread Flour
300 grams Whole Wheat Flour
7 grams Instant yeast / 9 grams Actively Dried yeast / 20 grams Fresh Cake yeast
20 grams fine sea salt
56 grams Roasted Pepper Oil / Extra Virgin olive oil
450-500 grams Water, room temperature
2 large or 3 medium Red Peppers, roasted
8 grams whole black peppercorns
3 grams dried basil
9 comments:
Thanks for the recipe! I was going to look up your foccacia, but will make this today instead! And I appreciate you mentioning Western Reserve. I checked the calendar and might come into town in June to take the Peter Reinhart 3 day class with my mom.
@Marmish: I did the Peter Reinhart class last summer (both the hands on and the demonstration) and it was FAB-U-LOUS. The guy is incredibly knowledgeable and even better than that, incredibly nice. Sometimes you get visiting chefs who are obviously only there to promote their new book, but Peter is a fantastic teacher. If you do decide to come into town, drop me a line and perhaps we can hook up with some of the Cleveland eG'ers.
The only other piece of advice I have for you is if you decide to do any of Peter's classes, call the school and reserve ASAP. Those fill up VERY quickly.
Oops. that previous deleted comment was me, too. I'm glad you liked the class. I hope my mom will take it with me. The Red Pepper bread turned out well for me.
@Marmish: Excellent! Was there any part of the instructions that wasn't clear or didn't make sense?
I had dinner tonight with several of the Cleveland eG friends and they were excited about the possibility of you (and your mom) coming into town for a possible visit. Let me know what you ultimately decide to do.
No, I thought they were clear and had no problems. I would have liked a summarized recipe at the end. It's easier to print out and take to the kitchen.
That's so sweet of y'all to be excited about lil ol' me. *blushing* I'll be in town for Christmas for sure although that's a crazy time for everyone. Maybe in late Jan/early Feb, too. I'll definitely let you know about the class.
@Marmish: EXCELLENT IDEA! I've amended the original post to place a tear sheet at the bottom of the post listing all of the ingredients you'll need. I've also amended the upcoming post for my casserole to do exactly the same thing.
I'm glad the bread turned out well.
Thanks for posting this! I'm looking forward to trying it in the near future. I might make loaves of both this and bacon bread and freeze half of each to have them on hand.
@Ben: No problem. I'm glad you remembered to return and look it up. Let me know how it turns out for you.
Hi, Tom,
It's been about ten years, but I finally got around to making this. It turned out excellent--very good for a mixed vegetable sandwich, or with hummus, or with guacamole--and I'm sending one of the loaves to my brother for his birthday this week.
Ben
Post a Comment